Heat Tape: Prepare NOW!

This year’s winter weather was one for the record books! If you’re in the Pacific Northwest, we are still holding our breath hoping that summer is just around the corner. Many home and commercial building owners had to deal with challenges when removing snow and ice from roof tops. Of course, that’s the time when we all think, “I wonder if heat tape would be helpful right now”. 

If you’re not familiar with heat tape and its benefits, I’m going to tell you right now…call an electrician NOW to get it installed onto your roof. Yes, I know we’re heading into April and enjoying the nice (snow-free) mild weather, but now is the time to be thinking of next year’s snow and ice potential. 

How Does It All Work?

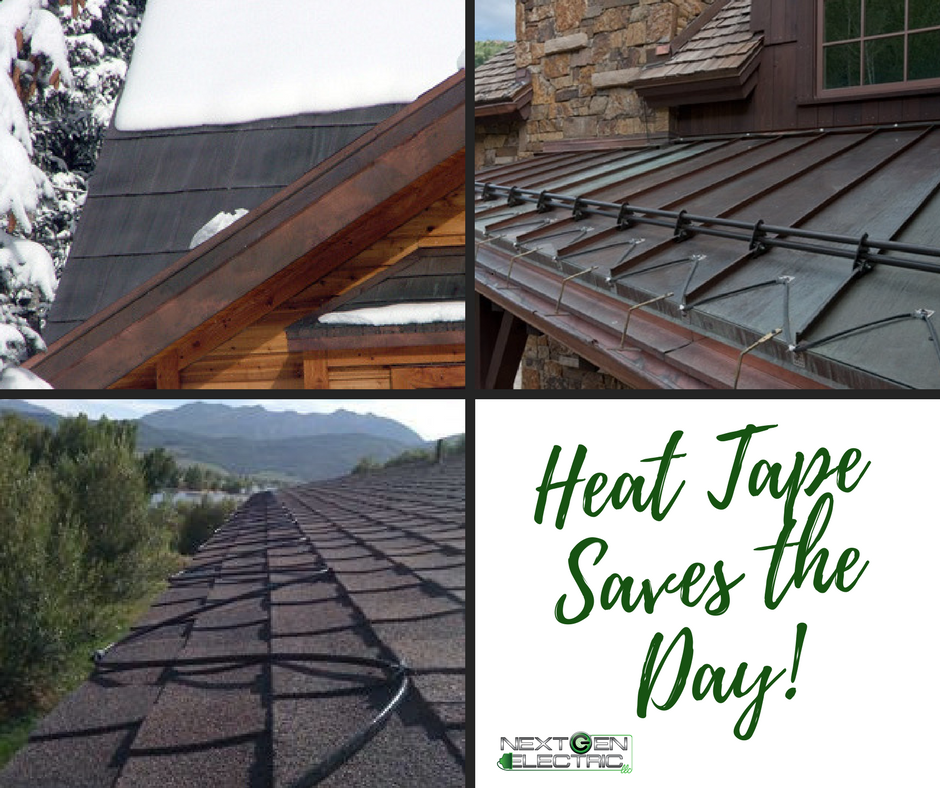
When the joy of winter hits us, our roofs and gutters host massive amounts of snow and ice. When the sun is out and snow starts melting, the dripping water needs a path to drain off the roof. Heat tape can melt a channel in the underside of the snowpack on your roof and give water a route to drain out. And heat tape installed in gutters and downspouts allows water to drain away from the roof, rather than getting plugged up by a dam of ice.

*DISCLAIMER*

Be sure to keep an eye on your roof throughout winter for ice damming. If blocks of ice buildup under the snow, that could indicate inadequate insulation. Ice dams and icicles hanging from the roofline is a possible indication of not enough insulation in the attic. That’s an entire other conversation! However, if you do the air sealing and insulation work to begin with, the need for heat tape on the roof is drastically reduced.

How Does This Effect My Energy Bill?

Yes, those that have heat tape installed on roofs or in gutters to help prevent winter ice dams may find their energy bill heating up a bit. However, using a heat tape timer can help make the system run more efficiently when it’s needed, and turns it off automatically when it’s not needed.

The best time to run heat tape is during the day, 6 a.m. to 6 p.m. whenever snow or ice is sitting on the roof. Heat tape is not effective enough to sufficiently melt ice during cold evenings, and it will just waste power all night long. The goal is to run heat tape only enough to keep a channel cut in the snow or ice.

There Are Cool Tricks To Help Saved Money When Using Heat Tape:

Installation of a heat tape system with a manual toggle switch will easily turn on the tape only when it’s needed, and switch it off later.

Tying the heat tape system into the building’s automation controls so the heat tape only operates when the air temperature is above 32 degrees and the sun is out.

A good rule of thumb if you keep things “old school” is to mark your calendar for mid-April or making a note to turn off heat tape at the breaker switch after the last big spring snow.

Next Gen Electric is always here to answer any questions regarding prepping your home or commercial building for cold weather. We offer FREE estimates and always provide education to help you stay successful. Give us a call today!
Are Your Solar Panels Ready For Winter?

Whether you’re in the market for solar installation or you’ve already invested, it’s important to understand the necessary maintenance for your panels. Luckily, solar panels don’t have any moving parts so there really isn’t much maintenance that is required. However, to gain the maximum potential and keep the highest quality of your system, you definitely should have them inspected a few times a year to ensure their efficiency. Inspections should entail removing any dirt or debris from the system as well as snow. It’s also important to review the panels to ensure no damage has occurred.

If you’re inspecting your panels yourself, always be sure to keep your safety in mind. If your panels are too high up on the roof to see very well from the ground, use caution with ladders and be sure to ask a friend to help provide support…moral and safety support!

Next Gen Electric offers solar panel maintenance services. Contact us today to schedule an appointment or to become a VIP customer with added bonuses including regular ongoing maintenance inspections. This is a better choice if you want a more thorough cleaning.

During our solar panel maintenance service, we get a lot of questions about cold weather and panel efficiency. We’ve compiled the top 3 questions here:

How Will My Solar Panels Do In Winter?

Solar panels work with light and not heat. That means that when the cold weather hits, your panels aren’t affected. In fact, they actually perform better in cooler temperatures.

Will My Solar Panels Produce Electricity When It’s Cloudy?

It may not seem like it, but even when it’s cloudy outside, there is still light. That’s all your solar panel needs. During winter, the days are drastically shorter, so that does affect how much electricity is produced vs. during the summer. However, panels trap any incoming light from all angles allowing your system to be efficient even on wintery cloudy days.

What If It Snows?

A professional installer will ensure that your solar panels are in the best position to get the maximum amount of sunlight possible. Typically, your system will be installed facing the south or southwest. Since the panels are smooth and generate a slight temperature change (warmer than snowfall), snow doesn’t stick to them like it would to your home’s shingles. It generally melts or slides away quickly and easily on its own.

What If It Snows…A LOT?

This can be common, especially for our clients in the Pacific Northwest! Blizzards can offer up some heavy now accumulation resulting in piles of snow on your roof and panels. Please consider hiring a professional when concerned about snow removal from your roof and panels. That way, you won’t have the added headache and cost of broken or damages panels. 

Be sure to give Next Gen Electric a call when it comes to your solar panel maintenance. We’ll be happy to answer questions over the phone or come out to your site for a FREE consult. We want to make sure that your system (weather we installed it or not) is successful and working properly for you. 

Home Generators: Preparing For Severe Weather

Winter weather in the Pacific Northwest can be unpredictable. Due to snow, ice, and high winds, downed power lines are to blame for power outages that can last for hours or days. Warm weather months is generally free from such harsh and long-term outages, however powerful thunderstorms can cause similar devastation.

A home generator is not only a convenience, but can be a life line for those that encounter loss of power throughout any season.

Braving The Cold

The thought of a power outage may bring positive memories. Thoughts of gathering everyone in the living room to play board games by candle light or tell stories with flashlights. It may even feel a little like camping. However, in cold weather, this type of togetherness could get old pretty quickly. It’s hard to have fun and create fond memories when you’re chilled to the bone. Even with today’s fireplaces, most of them aren’t built to heat entire rooms, only providing so much heat to go around.

Winter outages are known for kicking homeowners out, forcing them to retreat to hotels, friends, or family’s homes while repairs are made. You may be up for the trip, but what about your home? Your pipes could freeze causing thousands of dollars in damages. What about your pets? They may not be able to join you on your mini trip, and many small animals are able to survive intense cold.

Financial Hardships

Beating the heat in the summer may be harder than it sounds. You may be able to cool off by sleeping in the basement for a couple days, if you have one, but your home may not be so lucky. Not only would you miss your home amenities like a microwave and cell phone charger, but after 24 hours, your freezer will produce spoiled food. If you have more than one freezer, that’s just more food to worry about.

Today’s generators can run on propane gas or gasoline and can be installed with a transfer switch so they come on after a power outage regardless if you’re home or not. That way, if your home loses power while you’re away, you’re home and everything in it will be safe.

Protect yourself, your family, and your home by investing in a home generator and allow Next Gen Electric to provide the installation. We’ll be happy to provide new or updated outlets for your generator to ensure you’re ready for any season. 

Outdoor Lightning: Functional & Decorative

Winter is officially here and that means shorter days making it dark earlier. Many of us only think about outdoor lighting during the holidays when we want to give a little cheer to our outdoor lighting scheme. However, a good outdoor lighting design not only accentuates your home’s best features, it can be a safeguard against intruders and tripping accidents in addition to demonstrating your inner holiday enthusiast. 

Next Gen Electric can help you identify your lighting options and explain the work required to extend electricity to new areas of your property. But, it’s always wise to begin the process by educating yourself on the types of available outdoor lighting so that you can imagine different fixtures in your outdoor space.

Here’s a few ideas to get you started:

Lamp Posts:

  • No, I’m not talking about the old-fashioned, and possibly outdated lantern design. Outdoor lampposts run the gamut from traditional to downright futuristic. They’re perfect for marking driveway entrances and adding charm to outdoor seating areas.

Hanging Lights: 

  • These may look lovely hanging above front doors and on porches, but hanging lights can be placed just about anywhere there’s an open space with a ceiling or overhang. And, they look great even during the daylight hours.

Wall Lights: 

  • You will recognize some of the most practical security and motion-detector lights available in wall-mounted designs. Wall-mounted decorative lamps are ideal for areas where the outdoor space is right outside the door, such as a deck or patio.

Stake Lights: 

  • These lights are perfect for illuminating walkways and gardens. The best part about this choice? Many small stake lamps are solar-powered with a backup battery, which can save you money while looking great!

Well Lights: 

  • These small lamps sit below the ground so that only the lens shows, shining light upward or at a slight angle. Well lights are also great choices for lighting paths and can make a dramatic and fun effect when shining upward onto trees, tall shrubs or columns.

Ribbon Lights:

  • Flexible, water resistant, with an adhesive backing, ribbon lights (or strip lights) are used traditionally for accent lighting, backlighting, task lighting, and decorative lighting applications. Since the strip is flexible and can be divided at any point between LEDs, it is extremely versatile and can be used in a number of installations.

Tis the season for updated lighting! Contact Next Gen Electric today to schedule your FREE lighting consult. If you’re concern is minimizing your long-term costs while making a grand (or subtle) change to your outdoor lighting this season, we’ll be happy to explain solar and LED options for your project.

Halloween Electrical Safety Tips

For most of us, Halloween and decorating with lights indoors and outdoors is the kick off to the holiday season.

As you and your family celebrate Halloween with elaborate decorations, fun costumes, and candle lit displays, Next Gen Electric wants to make sure you are equipped with the following electrical safety tips to help you and all your little trick-or-treaters remain safe.

  • Always select/create costumes, decorations, and accessories made from flame-resistant, flame-retardant, or non-combustible materials.
  • Toss out the flame candles and use flashlights or battery-operated candles when decorating your home including your outdoor lighting: Jack-O-Lanterns, and other outdoor displays.
  • Carefully inspect each decoration before use. cracked, frayed, or bare wires can cause serious electric shock or start a fire.
  • Plug your outdoor decorations into circuits protected by a ground fault circuit interrupter (GFCI) to prevent electric shock.
  • Are your electrical decorations you plan to use outdoors are marked “For Outdoor Use”? If not, ditch them and get outdoor graded décor.
  • Keep your electrical cords out of high-traffic areas, including doorways and walkways, to minimize tripping hazards.
  • Don’t nail or staple light strings or extension cords. They cause damage to the cord’s insulation and can create fire and shock hazards.
  • Don’t forget to turn off your electrical decorations and put out any open flames before leaving your home or going to bed.

Next Gen Electric is your electrical and solar expert. We have over 15 years of experience supporting homeowners to stay safe while connected in their home.

Give us a call today for any electrical or solar needs!

ReplacingYour Smoke Alarm FAQ’s

Did You Know That Your Smoke Alarm Has An Expiration Date? 

It does!

Every smoke alarm has a manufacturer’s date. According to the National Fire Alarm and Signaling Code (NFPA 72), it’s required that all smoke alarms be replaced within 10 years of that date. Actually, the manufacture’s instructions for most smoke alarms state that they are to be replaced when they fail to respond. This could be BEFORE their expiration date of 10 years. 

What does that mean for you?

It’s Time To Check Your Smoke Alarms!

Be sure to walk around your home and check all smoke alarms and carbon monoxide alarms for their manufacture’s date. This can be found either on the side of the alarm or the back cover. In order to check, you’ll need to remove the alarm from it’s base on the ceiling. To do this, twist the alarm counter-clockwise.

It’s best to replace the alarm with the same manufactured alarm so that no other assembly is required. The new alarm from the same manufacturer can be placed on the ceiling or wall plate with no problems. However, if you’re replacing the old alarm with a different manufacturer, you will need to remove the old ceiling plate and install the new one included with your new alarm. Once you’ve replaced your new alarm, be sure to test out the unit by pushing the center button to make sure it’s working correctly.

If your alarm is hard-wired into the ceiling, but sure to take extreme caution to keep everyone safe. If you know how to work with electrical wiring, follow the manufacturer’s instructions. Otherwise, contact a qualified electrician.

Next Gen offers FREE consultations for any electrical service and we are happy to replace your old smoke alarms including testing them. Give us a call today to schedule  your appointment. 

For a more detailed and step by step demonstration of these steps, watch our how-to video “Don’t Wait, Check The Date”. 

Stay Fire-Free With AFCI’s

Throughout the past 30 years, our homes have been largely transformed thanks to modern electrical devices. However, these helpful devices have also supported and contributed to the number of electrical fires throughout the U.S each year. Current homes are overwhelmed by today’s electrical demands, putting them at greater risk of arc faults and arc-induced fires.

What Is An Arc Fault?

An arc fault is a dangerous electrical problem caused by damaged, overheated, or stressed electrical wiring or devices. An arc fault occurs when older wires become frayed or cracked – possibly due to a nail or a screw behind a wall. It’s also common when outlets or circuits are overburdened carrying too large of a load. Think of a bolt of lightning, for example. Lightning is a very large and powerful arc that crosses from an electrically charged cloud to the ground, or another cloud. When an electric current in your home crosses to an energized component to a grounded component, a glowing discharged is formed called an arc. Just as lighting can cause severe damage, arcs produced in your home wiring are capable of producing high levels of heat that can ignite surroundings causing fires. In the U.S, arcing faults case more than 44,000 home fires each year. This results in hundreds of deaths, injuries, and millions in property damage.  

What’s The Solution?

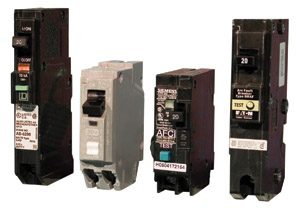
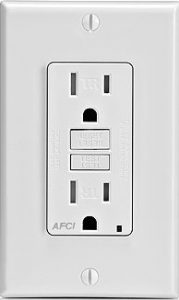
According to the Consumer Product Safety Commission, an arc fault circuit interrupter (AFCI) could help prevent more than 50% of the electrical fires that occur every year. AFCI’s are special electrical outlets and circuit breakers designed to detect and respond to potentially dangerous electrical arcs a home. 

AFCI’s function by monitoring the electrical waves moving through your home and then interrupting the circuit they service if they detect changes in the wave pattern that may become a dangerous arc. They also are capable of distinguishing safe and normal arcs, like those that are created when a switch is turned on or a plug is pulled from an outlet. AFCI’s are extremely sensitive so that they can detect, recognize, and respond accordingly to extremely small changes in wave patterns.

Where Do Arcs Typically Form?

Arcs tend to form where wires are installed improperly or when insulation becomes damaged. In many older homes, wore insulation will eventually crystallize as it ages, becoming brittle and will crack and chip. Damaged insulation exposes wire to it’s surroundings, increasing the chances of arcing in your home. 

Arcs May Occur In The Following Situations:

damaged electrical cords
damaged wire insulation due to nails and screws driven through walls
damaged appliance cords due to heat, aging, kinking, and over extension
liquid spills
loose connections in outlets, switches, and light fixtures

To Keep You And Your Home Safe From Fires, It’s Best To Have An AFCI In The Following Locations:

  • Kitchen
  • Family/Living Room
  • Dining room
  • Bedrooms
  • Den/Office
  • Hallways
  • Closets
  • Bonus/Play Rooms

Each state has it’s own provisions based on the National Electrical Code requirements for AFCI protection in new homes. It is up to the home owner to know and understand what is available to protect your home and our family from electrical fires. 

Depending on the size of a given home, the cost impact for installing additional AFCI protection is about $75 per circuit. That’s a small price to pay when it comes to saving your loved ones and your home from damage, injury, or death. There’s no doubt that AFCI’s provide advanced protection against electrical fires, but only if they are working properly. REember to reach out to your trusted Master Electrician to inspect and service your elctrical to ensure a safe and fire-free home. 

Call Next Gen Electric today to get a FREE consult. We’re happy to take a look around your home to troubleshoot or provide peace of mind for you and your family. 

Are You Eligible?

Solar adoption is taking flight thanks to the price of solar panels plummeting. This enables homeowners and businesses to save more money by controlling their own electricity costs instead of being at the mercy of rising utility rates.

We’ve shared before about the top motivators to switch to solar but for most, the federal incentive is where it’s at! Thanks to the Federal Residential Renewable Energy Tax Credit, homeowners can help themselves to a 30% incentive.

The Best Part?

This incentive is now good through December 31, 2019!

A tax credit is a dollar-for-dollar reduction in the amount of taxes owed. For example, a typical solar array with Next Gen will cost around $13,000 for a 4 kilowatt installation. In this example, the homeowner would benefit from the federal tax credit and reduce their taxes by $3,900. Yes, please!

This incentive is super easy to take advantage of. Like with any good deal, you much do your research to ensure that you’re eligible and how to claim your credit.

REMEMBER:

We know solar, not taxes! The information provided below may not be appropriate for your situation. Be sure to consult a tax professional before filling your tax credit to ensure you meet the requirements.

Eligibility

To qualify for the 30% Federal Residential Renewable Energy Tax Credit, you must meet the following requirements:

  • Have A System Installation Date On Or Before December 31, 2019
  • Panels Are On A Residential Location In The U.S.
  • The Solar Panel System Is New Or Being Used For The First Time
  • You Own The Panels (Not Leased)

Your Next Gen team is happy to help with any questions you may have. We know that going solar is a big decision and a large financial decision. That’s why we want to make sure that you are fully educated on how much your specific situation will cost and how much money you can expect to stay in your pocket. For a free Solar Site Evaluation, visit our website or call our office to get scheduled today: 208.765.WIRE.

For current information on incentives, including incentive-specific contact information, visit the Database of State Incentives for Renewables and Efficiency website at www.dsireusa.org.

Understanding Electric Vehicle Charging

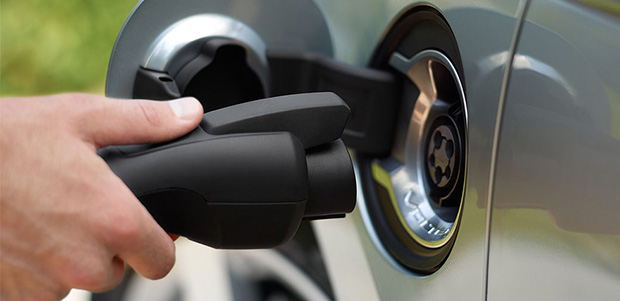
Trading a gas pump for a plug-in is a wonderful thing. It’s far more convenient, saves you time, and keeps you from breathing toxic fumes after fueling. Charging is a different experience all together and understanding the ins and outs can take some time. I’ve been driving electric for over two years and I’m still learning!

If you’re looking to drive electric, you may want to get ahead of the learning curve now. It will save you some time and it may even help you save some money! 

Mostly, I’ll relate how charging works for a Nissan Leaf, a four-door, five-passenger hatchback with a range of about 100 miles. I’m most proficient with this product since that’s what we have for our family vehicle. I’m my experience, it’s one of the best local commuter care since the Leaf is intended for typical daily driving, which means around 40 miles or less per day. Occasional longer trips are certainly possible with this vehicle. By understanding charging, you will soon be able to evaluate whether an EV will suit your driving needs.
 

Level 1 Charging: Standard Outlet

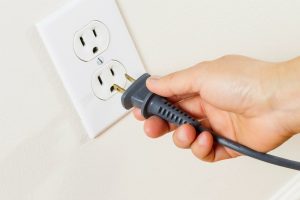
Level 1 charging is the technical jargon for plugging your car into a standard household 120V outlet. For a Leaf, this means about 4.5 miles of range per hour of charging, or about 22 hours for a full charge.

22 hours?! That’s way too long! 

Hold on! Let’s break this down. First of all, you’ll rarely need to do a full charge from 100% empty to a full charge. If you drive 40 miles per day and charge overnight, you’ll be back to full in 9 hours. Think about charging your cell phone. Most of us plug in our phones at night once we hit the hay. We don’t think about how long it’ll take to charge once we’re sleeping, right? We’re just happy that charging is complete once we wake up and need to start our day. 

What if you have to drive more than 40 miles in one day, say 80 miles? Yes, it would take 18 hours to get a full charge, but with a 9-hour overnight charge, you’ll be ready for your normal commute the next day. And, if you drive less than 40 miles per day or charge for more than 9 hours, you’ll work back up to a full charge over the next day or so. 

If you need to drive 80 miles on consecutive days, you’ll need a “plan b”. That gas-guzzler you keep around for long trips? You may have to opt for that one. Or, there may be public EV chargers in your area. You can sneak in a movie, dinner, or shopping while you plug in. 

Beyond range issues, Level 1 may not be suitable for primary charging in all cases. In extreme climates, more power may be required to maintain proper battery temperatures. In these cases, Level 2 charging may be more appropriate.
 

Level 2 Charging: Charging Station

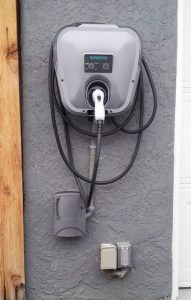
Level 2 supplies 240V, like what an electric dryer or oven uses. It goes through a box and a cord that improves safety by waiting to send power to the plug until it’s plugged into an EV. Level 2 allows for a wide range of charging speeds, all the way up to 70 miles of range per hour of charging. Both Level 1 and Level 2 charging stations simply deliver household electricity to the car. Electronics within the car transform the power into the proper form which then charges the battery.                                   
Nissan recommends that you install a Level 2 charging station at home. If your budget allows, you can consider if part of the cost of the car (it’s an added expense). There’s also a 30% federal tax credit (up to $1,000) for installing EV charging, which can make it less expensive. Still, if you are planning to use your EV for a daily commute of 40 miles or less per day, you should at least consider using Level 1 charging at home. You can always add a Level 2 charging station later if you decide you need it.    

In the works currently, 20,000 public Level 2 charging stations (limited to 6.6 kW) will be installed. Even if you only have Level 1 charger in your garage, you may have access to convenient Level 2 charging available while your car is parked and you’re doing something else.    
I’m already beginning to see these charging stations in my town and surrounding area. They now make it possible to drive 60 miles and pick up about 50 miles of range in 4 hours while you’re having fun, thus easily driving over the single-charge range while always keeping a healthy reserve.

 
Regardless if you decided to use a Level 1 or a Level 2 charger, remember that Next Gen Electric can install either of them for you! Still need some help deciding what is best for your needs? Shoot me a message. I’m happy to respond to inquiries regarding EV’s, chargers, and any other electrical questions: info@nextgencda.com. You can also schedule a FREE consult where I will come out to your home or business and go over options that suit you best.

How To Clean Solar Panels

Solar panels are generally self-cleaning, but in particularly dry areas or where panel tilt is minimal, dust and other substances such as bird droppings can build up over time and impact on the amount electricity generated by a module. Grime and bird poop doesn’t need to cover an entire panel to have an effect.

Tips for cleaning solar panel glass:

Safety First

Follow the procedure in your manual for shutting down the system before commencing cleaning. For safety reasons, it’s also wise to clean your panels from the ground if possible. A good quality soft brush and a squeegee with a plastic blade on one side and a cloth covered sponge on the other coupled with a long extension can make for the perfect tools allowing you to stay on the ground. Use a hose with a suitable nozzle to allow the stream of water to reach the panels.  NOTE: If cleaning your panels from the ground is not possible, do not attempt to access your rooftop unless you have the appropriate safety equipment and training. If you don’t; hire a suitably qualified professional instead.

Time of Day

Clean your panels on an overcast day, early in the morning or in the evening. If the sun is beating down on the panels, any water used can quickly evaporate and dirt will become smeared.  Early morning can be a particularly good time for cleaning as dew that has settled on the panels overnight will likely have softened grime; meaning you’ll need to use less water and less energy to clean your solar panels.  If the panels are dry, before tackling the modules with water, brush off any loose materials first – this will make cleaning easier and faster.

Materials

Don’t use metal objects or harsh abrasive products for removing caked on materials – scratching the glass on a solar panel can affect its performance as scratches will cast shadows. Avoid using detergents if possible as these may streak the glass of the panel. Use of abrasive powders also risks scratching the panels.  Given the nature of good quality solar panel glass, clean water and a little scrubbing with a coarse cloth covered sponge or soft brush should remove the most stubborn grime.  Plastic scourers may also be used.  If your mains-supplied water is hard (mineral-rich) and rainwater is available; use that as a final rinse; then squeegee dry. If hard water is all you have, just be sure to squeegee well as mineral-laden water can form deposits on glass as it dries.

Dealing with Oily Stains

Oily stains can occur in some installation scenarios, such as if you live near an airport and are under a flight path or if you live adjacent to and downwind of a major roadway frequented by trucks. If oily stains start appearing on your panels; isopropyl alcohol can be used as a spot-cleaning substance..

The final word on solar panel cleaning:

The old saying “if it ain’t broke, don’t fix it” applies – in most residential installation scenarios, solar panel cleaning just isn’t worth the bother – or the potential danger if accessing your rooftop. Unless dirt is clearly visible or performance is noticeably impacted; simply let nature do the job for you.